Pilates – back to basics:
It’s time to strip back to our core treatment method, Pilates. (Pun intended!) Today I would like to delve into Pilates principles and body cues to help you get the most out of your Pilates session.
How did Pilates first come about?
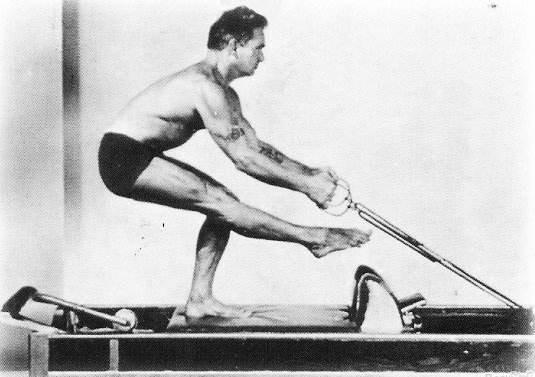
Pilates was created by a man called Joseph Pilates 60 years ago. Joseph was very focused on physical function and strength, having had a number of health issues early on in his life. He created this exercise and called it ‘contrology’. Contrology had an emphasis on mind/muscle connection and breathing. Repetition helped to create habitual and automatic movement patterns. Joseph Pilates believed the ‘core’ muscles to be the ‘powerhouse’ of all muscle systems. His theory was that a strong core would help to optimise everything else.
Pilates across all demographics:
Pilates was used as rehabilitation for war veterans during WWI, ballerinas and gymnasts. Traditionally, Pilates focused on the large/global outer core muscles and not as much the smaller/inner stabiliser muscles. Since then, Pilates has been clinically-modified by Physiotherapists and other health professionals. This has enabled Pilates principles to align with current guidelines for injury management and general functioning.
Important Pilates principles:
These principles help to optimise the benefits of Pilates (As per Australian Physiotherapy & Pilates Institute – APPI):
1) Remember to breathe:
Breath holding is very common when learning an exercise or when exercising at a challenging level. This can cause over-bracing of your abdominals and a downward pressure onto your pelvic floor. Over time, this can cause a weakening of these important muscles.
2) Lateral (outward) breathing
How you breathe is also important. It is very common to be an ‘apical breather’, also known as a shallow breather. This is when we breathe using only the top part of our lungs. This can overload our neck muscles and lead to fatigue and pain. By breathing more deeply and getting an outward expansion of our ribcage, we get enhanced oxygen intake and efficiency of the deep core muscle system.
Practical – do try this at home!
- Lie on your back with your knees bent and place your hands along the lower half of your rib cage with your fingertips slightly interlaced. Breathe in and allow your ribs to expand widthways.
- In sitting or standing, wrap a scarf or towel around the lower half of your ribcage, crossing it over at the front. Breathe in and allow your rib cage to expand against the towel. As you breathe out, ensure you relax through the tummy.

3) Centering (find your “neutral spine”)
Our inner core is a deep muscle system that includes a number of important muscle groups. These include your pelvic floor muscles, inner abdominal muscles (Transversus abdominis – TA), deep lower back muscles and diaphragm. These muscles work together to like an inner corset and provide support to the spine, pelvis and organs in the tummy/pelvis.
To find your centre, first find your neutral spine.
- Lying on your back, move your hips/lower back forward and back into the extreme positions (really arching your lower back, then really rounding it).
- From here, position your lower back about halfway in between with a little bit of space (blueberry size) underneath your back and this is your neutral spine. This is a position that embraces our natural spinal curvature. Researchers have found that this helps to better isolate these deep centring muscles that support our spine/pelvis.
- Lastly, breathe in, then engage deep core on the breath out (less is more here). Cueing need to be tailored/individualised here and can be done with the help of our of our Physiotherapists. You are now all ready to load up your core!
4) Rib cage placement
Check for ribs flaring/poking up and out towards the ceiling. To prevent this from happening, imagine you have a set of springs from your rib cage down to the front of your pelvis – keep the tension on those springs. As you move your arms above your head, it is sometimes tricky to keep that rib cage down so watch out for that one!
5) Shoulder blade placement
Stability around the shoulders is crucial for movement of your arms and neck.
- Gently squeeze your shoulders down towards opposite back pockets or think ‘widen collar bones’.
- Lie on your back and hold an imaginary helium balloon. Keep your arms straight and imagine the balloon is pulling your arms to the ceiling. Always aim to have a sense of width between your shoulder blades.
6) Head and neck placement
- Gently tuck your chin (imagine an apricot under your chin – hold it there very gently).
- Lengthen the back of your neck – imagine you have a helium balloon attached to the top of your head and is pulling you up nice and tall, floating upwards.
If unsure, please ask your PMPP Physiotherapist. We look forward to helping you get all the benefits from your Pilates session.
~ Lucy
You may find this blog on ‘mindful breathing’ by Ali helpful: https://portmelbournephysio.com.au/mindful-breathing/